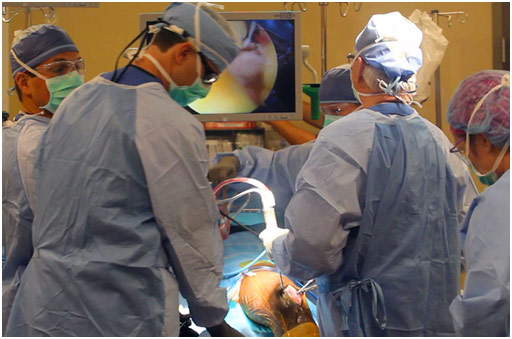
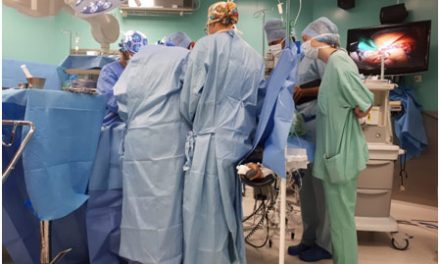
For 2 weeks in August 2018, I was in Warsaw, Poland for the Gap Medics Internship. The experience was fascinating, allowing me to observe surgeries from the same vantage point as the operating doctor while also giving me the opportunity to learn so much more about medicine. My first week in Poland was spent in the gastroenterology and transplantation department while my second week was spent in the orthopedics and traumatology department. Both weeks proved especially insightful and just showed how life-changing, and hard, medicine truly is. In this post, I will be discussing three orthopedic surgeries: a partial hip replacement, an ACL repair, and an open reduction and internal fixation for a subtrochanteric fracture with intramedullary nailing.
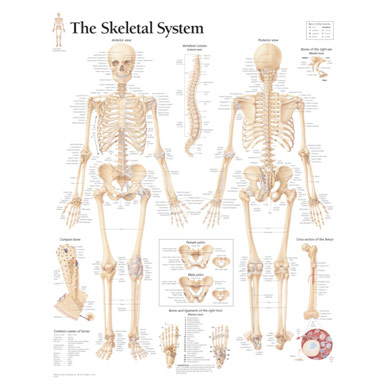
The Skeletal System
A hip replacement is a treatment for the hip joint; the surgery is either total or partial. Total hip replacements are generally done in cases of osteoarthritis and rheumatoid arthritis. Partial hip replacements, or hemiarthroplasties, are not generally done for arthritis because the entire hip is usually affected. Thus, hemiarthroplasties are usually performed for certain femur fractures (the patient I saw had an intracapsular femoral neck fracture), especially for elderly patients because bone healing is usually poor and because cognitive impairment often leads to noncompliance with the physical therapy needed for conservative treatment. Sometimes, a femoral neck fracture can also disrupt the blood supply, causing necrosis if the surgery is not done. A hemiarthroplasty, as the name suggests, is when only a section of the hip is replaced. More specifically, it replaces the ball of the hip joint, not the socket. In younger populations, femoral fractures are generally dealt with through internal fixation and reduction. Younger people tend to be more active and have a lot of years ahead of them, so it is wise to try to preserve the hip joint. For elderly patients, a hemiarthroplasty is done because they are less active, so preservation of the hip joint is not a priority. However, you do not do a total hip replacement because it is more invasive and because it likely will not greatly improve their quality of life. You generally only do total hip replacements for people that are neither young nor old, partly because the bipolar prosthesis used in hemiarthroplasties can cause a hole in the pelvis.
The hip joint is a ball-and-socket synovial (or movable) joint where the femur articulates with the pelvis. The femoral head forms the ball that fits into the socket of the acetabulum. Both the femoral head and acetabulum are covered with cartilage; cartilage that surrounds the acetabulum in a ring is known as the acetabular labrum. The three extracapsular ligaments (iliofemoral, pubofemoral, and ischiofemoral) and the sole intracapsular ligament (ligament of the head of the femur) work to reinforce the joint. The implant for the hemiarthroplasty was a metal ball fixed to a metal stem because only the head of the femur was going to get replaced. However, because this was specifically a bipolar, not a unipolar hemiarthroplasty, there was a larger ball lined with polyethylene put into the natural socket, so the implant was only indirectly articulating with the natural socket.
The surgery began with general anesthesia begin given and an incision was made in the side of the thigh with the posterior approach. Subcutaneous fat and fascia was divided with the help of the electrocautery and the muscles were retracted out of the way. Great pains were taken to locate and protect the sciatic nerve from injury while she incised the joint capsule, made of the ligaments described earlier. This exposed the joint and allowed Dr. Agnieszka to dislocate the joint by flexing and extending the patient’s leg; the dislocation removed the head of the femur from the acetabulum. She then performed a femoral neck osteotomy with a power saw. A corkscrew helps Dr. Agnieszka remove and measure the size of the femoral head to ascertain the size of the implant needed. Using a return, Dr. Agnieszka made a hole in the femur. Initially, she started with a small return before progressively using bigger ones to make a canal in the femur big enough for the implant’s stem. Following femoral reaming, lavage was performed where the femoral canal was washed to remove debris and tiny bone fragments. The stem was hammered into the patient, and some cement was put in to help the stem stay in place. The body’s natural bone healing will also help with that. The bipolar head is then attached to the stem before the joint is reduced into its final position where it is fixed into the now polyethylene lined acetabulum with the help of the bone cement. The layers of ligaments, fascia, etc. were then closed up, and a sterile dressing was put on.
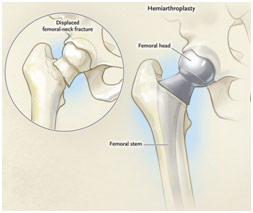
Hemiarthroplasty Implant
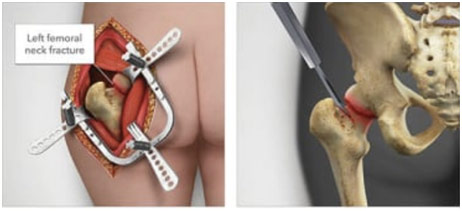
Left Femoral Neck Fracture and Femoral Neck Osteotomy
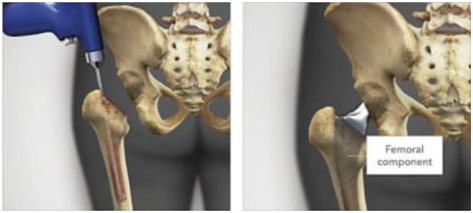
Reamer Making Femoral Canal and Femoral Component Being Placed In
The ACL, or anterior cruciate ligament, is key for the stabilization of the knee joint, connecting the femur to the tibia. An ACL tear is one of the most common knee injuries, most often found in people who engage in demanding sports like soccer and skiing where there may be sudden changes in motion or direction. Immediate symptoms include a loss of range of motion and immense swelling. Since the ACL cannot heal on its own, reconstruction is often needed to assist the healing process and restore range of motion. The surgical case we saw was a patient who had an ACL reconstruction years ago but fell down, and it appeared based on the MRI and clinical symptoms that the graft ruptured. Thus, Dr. Agnieszka determined to do an arthroscopy to see the extent of the damage on the inside before making a surgical decision.
Arthroscopy is done to “look within the joint.” With small buttonhole incisions, instruments are put in to understand what is happening in the knee. For instance, a small fiber-optic camera with a powerful light source is put in to illuminate the structures and transmit the visual information. In another tiny incision, surgical instruments to manipulate the structures are put in. The advantage of arthroscopy for diagnosis and ACL reconstruction, if the diagnosis is confirmed, is that it is less invasive than open surgery, reducing the damage to the patient and the patient’s recovery time.
Dr. Agnieszka put in a cannula from which the synovial fluid, cloudy and a little bloody, could be evacuated from the knee to allow for better visualization. Meanwhile, sterile saline was being pumped in in great volumes. Anytime the camera got a little blurry, she would just release some more of the synovial fluid. Then, through the buttonhole incisions, the camera was put in, allowing Dr. Agnieszka to see that there was no injury to the medial and lateral meniscus as well as the PCL. However, the fibers of the normally smooth ligament indicated that the ACL was torn and specifically from its tibial attachment, a very rare case as most of the time the ACL is torn off of its femoral attachment. Using a shaver and grasper, she removed the torn ends of the ACL graft. Also with these instruments, she proceeded to remove small pieces of bone fragments (osteophytes) that were loose and just floating in the intertrochanteric fossa because they would get in the way during the reconstruction if she did not remove them. There was one large osteophyte on the head of the tibia that needed to be divided into smaller pieces and taken out piece by piece because it would not fit through the buttonhole incisions otherwise. There was another one under the meniscus that also had to be removed because it could have injured the meniscus even moreso.
Because this was a revision surgery, Dr. Agnieszka explained that she prefers using the patellar tendon as an autograft over the hamstring tendon, which is generally used for first time ACL reconstructions. As ACL reconstruction generally involves the drilling of tunnels into the tibia and femur to help attach the hamstring tendon, there were already tunnels in this patient because this was a revision case. Thus, Dr. Agnieszka tried to find the original femoral and tibial tunnels, which she noted are sometimes difficult to find since they are covered with bone by the body’s natural healing. To help with locating the tunnels, she removed the stitches from the old ACL graft. Generally, Dr. Agnieszka is disinclined to reuse these tunnels for revision cases, but identifying them is paramount because drilling the new tunnel too close to the old tunnel risks making a big hole in the middle of the bone that will not hold the autograft in place. Following identification and confirmation that they were not fit for reuse, Dr. Agnieszka proceeded to use a reamer to make new femoral and tibial tunnels, still through those buttonhole incisions. They were initially very small in the area because it just needed to be big enough for Dr. Agnieszka to put in a guidewire so that she could position a tunnel dilator in place to make the correct sized tunnel. Dr. Agnieszka fixed meniscus damage with sutures and took out the ruptured graft.
Now, Dr. Agnieszka shifted to harvesting the patellar tendon. She made an open incision on the knee and used a ruler to measure out how much of the tendon she needed to harvest. They marked the borders to the middle third of the patellar tendon and used an electric saw to help remove the middle third of the patellar tendon with a little bone on either side. Thus, this graft is known as a BTB, or bone to bone, graft. The patellar tendon alone is generally too small for reconstruction, so the bone adds the much-needed length and allows for better healing since bone interacts directly with bone rather than the tendon with bone. She even marked the end of the bone part with a purple marker because it is difficult to tell the difference between the bone and tendon during the arthroscopy. She also prepared the tendon by shaping the bone so that it would fit into the tunnels and drilling holes in each of the bone plugs to pass sutures through it to assist with holding and threading the graft in.
After the tendon was prepared, Dr. Agnieszka shifted to doing the repair itself. She tried to assess the anatomical location of the original ACL because that is ideally where you attach the new ACL. While it was difficult to see the remnants since, once again, this was a revision surgery, Dr. Agnieszka felt that she got very close to the exact location. She threaded the tendon through the tunnels, made sure the connection was snug by putting in small absorbable screws between the femur and the bone and the tibia and the bone. She then tested the flexion and extension of the knee to make sure the surgery was successful and closed the patient up.
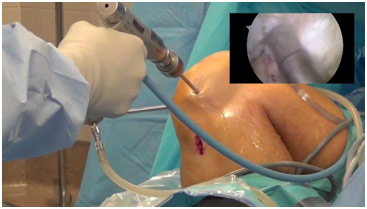
Surgical and Arthroscopic View
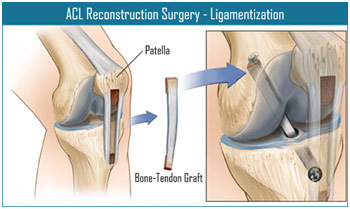
ACL Reconstruction with BTB autograft from Patellar
Another surgery I saw was the open reduction and internal fixation of the femur for a subtrochanteric fracture with the use of intramedullary nailing. The fracture was too far down to even consider replacement with a prosthesis, so Dr. Agnieszka resolved to use nails to fix this fracture in the femur shaft. What made this case especially interesting was that the patient had had renal cancer in the past, so the fracture could have been pathological due to a metastasis to the bone. This was supported by the continuous bleeding of the patient because of the tumor’s deep vascularization, requiring the continuous cauterization of vessels in the soft tissue. Pathological fractures occur because a disease, like cancer, weakens the bone and makes it more susceptible to being fractured. Thus, Dr. Agnieszka was taking biopsies to test for cancer to ascertain her diagnosis. However, she also took samples for bacteriology to test for infection since that could also explain the infection.
Dr. Agnieszka made a small incision near the hip and drilled a small hole in the medullary canal (bone marrow cavity) of the femur. She fed a K-wire into this small tunnel to help guide the reamer in to make an even larger tunnel in the medullary canal. This larger canal allowed Dr. Agnieszka to actually hammer the intramedullary nail into the femur, once again with the help of the guidewire. What was special about this nail was that it had numerous holes for the purpose of putting other screws perpendicularly into it to lock this IM nail in place and achieve proper reduction and fixation. What was also interesting about this nail, as well as the reamer, was that they both had a small hollowing in its middle just for the K-wire, showing how important guidance is.
With the help of a special U-shaped tool, the drill-guide template, that wrapped around the femur on the external side, Dr. Agnieszka worked to drill in the screws, described earlier, into the IM nail. With the help of fluoroscopy or a continuous x-ray, to see the bones during the surgery, Dr. Agnieszka tried to position two screws through the IM nail and into the femur as the bone would prevent further movement of the screws. The fluoroscopy gave her two views—AP or anterior-posterior view and oblique view—to help ensure that she did not misposition anything. Once again, she put the K-wire to get the proper alignment before drilling the screw into place. This was a difficult process to get the proper alignment, filled with a great deal of moving the screw in different angles because the suspected tumor was obstructing her access. Thus, she would keep putting the screw in before needing to take it outside the body because it was not aligned according to the fluoroscopy. However, once she got the screws in the right place, she removed the K-wires as well as unscrewed the drill-guide template off the IM nail. Lastly, Dr. Agnieszka closed up all the incisions like the ones for the IM nail and the ones used to drill the screws in.
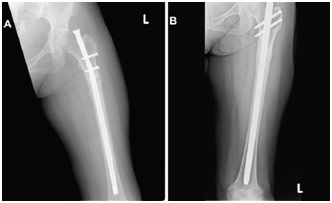
CT Scan after Intramedullary Nailing
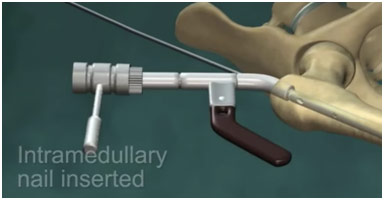
Intramedullary Nail Being Hammered In
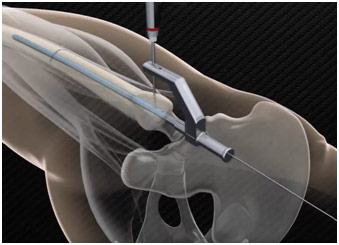
Drill-Guide Template
All in all, the Gap Medics experience was one of a kind. I got such a wonderful opportunity to see such interesting cases up close and watch surgeries from an unbelievably close distance thanks to amazing mentors like Dr. Agnieszka. I saw surgeries done nearly flawlessly as well as surgeries with a few inadvertent complications, helping me to get a realistic picture of what medicine looks like. The experience was both rewarding and unforgettable.

